Showing posts with label scrap. Show all posts

Friday, December 1, 2017

Anatomy of a Snowflake...

One of my favorite projects for December/January has been my snowflakes. I love how they look on my porch, hanging on a wall, or propped on a mantel. Just like real snowflakes, each one is unique. Sometimes the wood I use is old, sometimes it is new. I have used paint, stain, or left the wood a natural color. I will show you my process, but here are some I have done in the past:

These 3 were my first attempts. How I wish I had kept them!


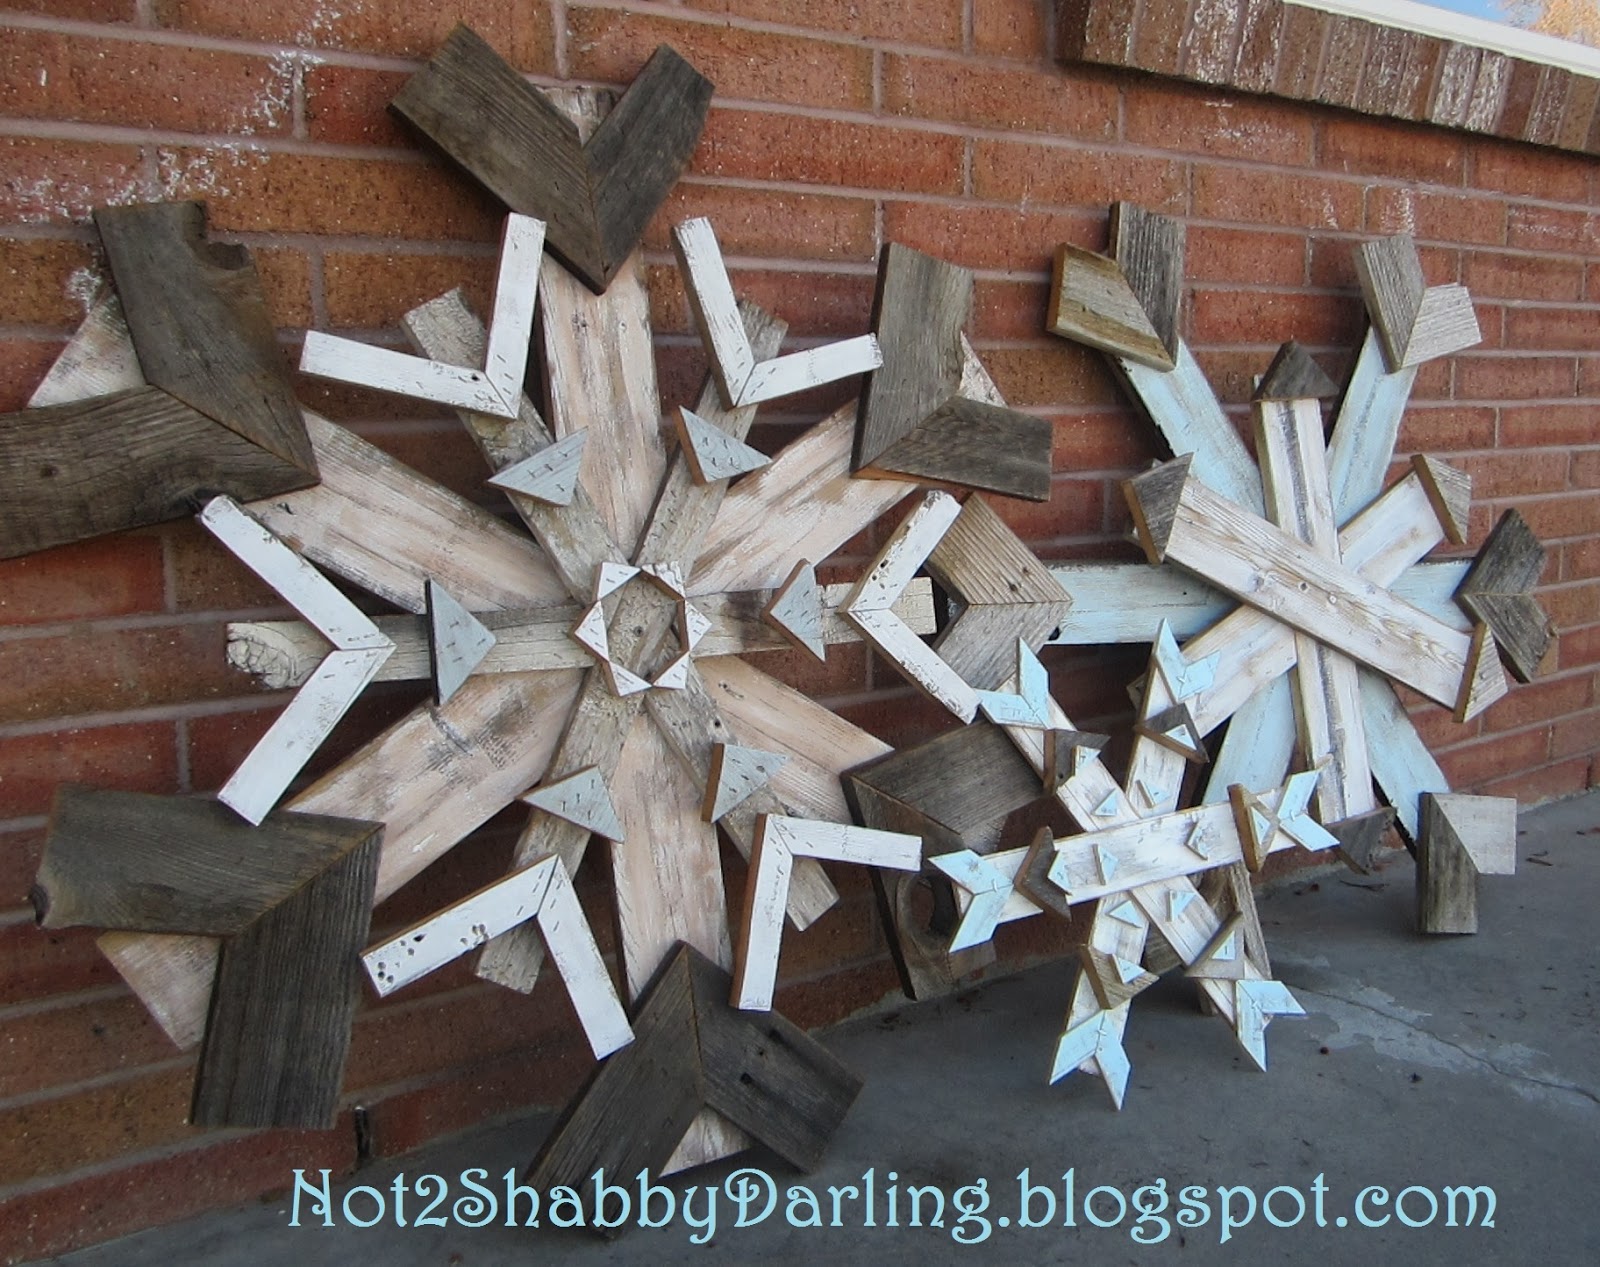
I love the combination of blues and browns.

This was a giant! It was about 4 1/2 feet tall, made from huge reclaimed pallets.

This one was on the smaller side, about 2 feet tall.


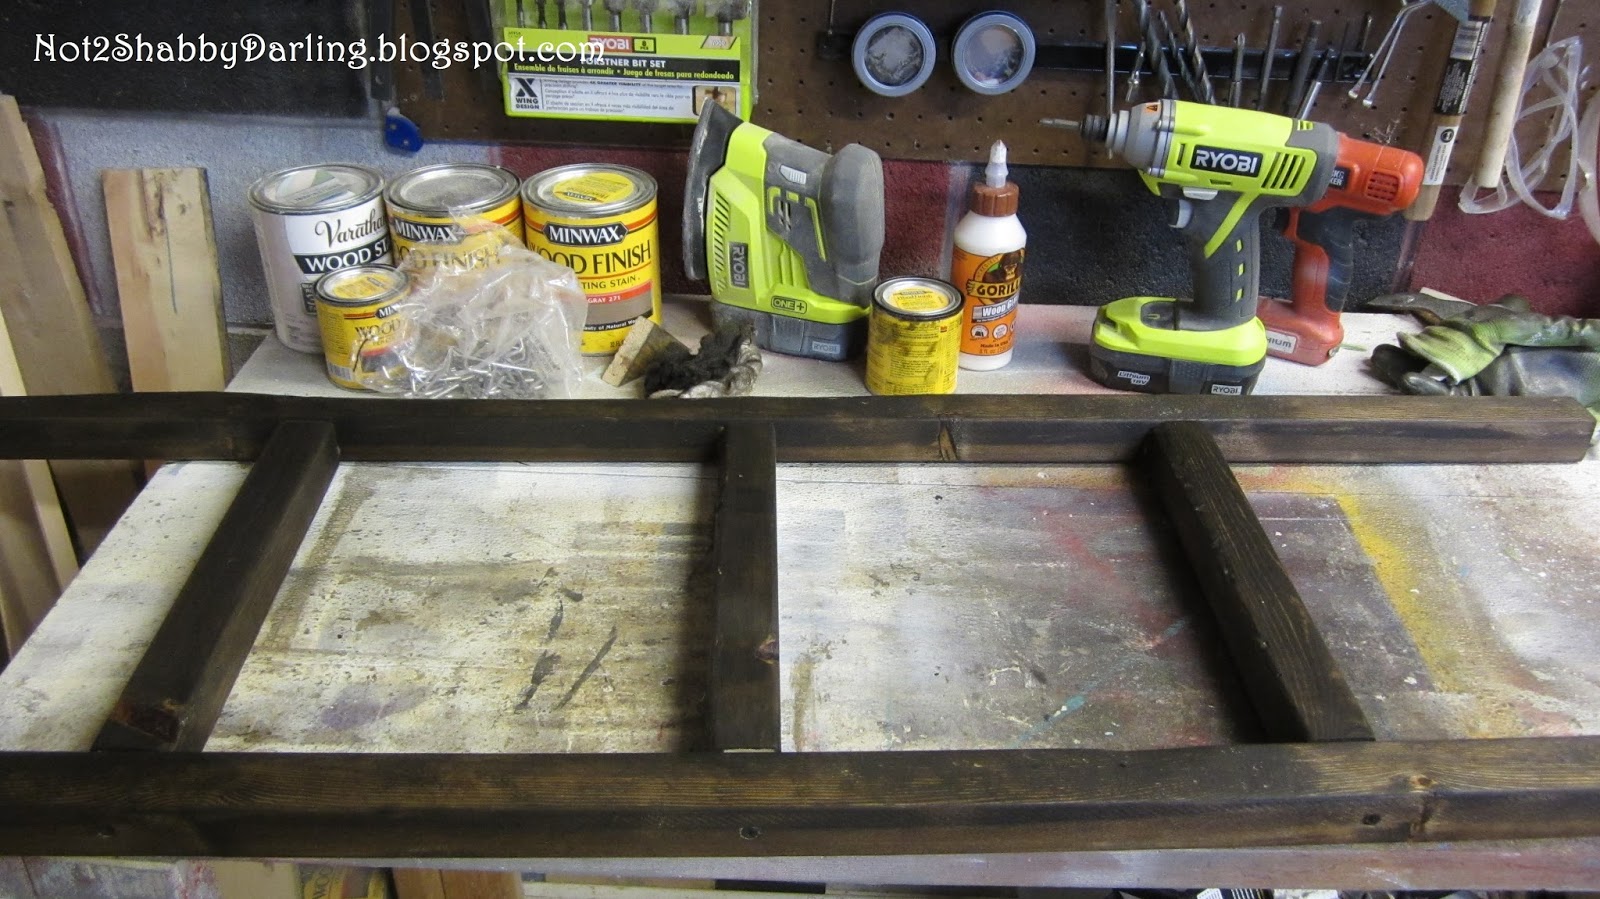
I prefer using reclaimed wood, but it isn't always available. I bought some 6' cedar fence boards at Home Depot for about $2 a piece. I cut 3 of the boards in half. You can cut them longer, but I like to get 2 snowflake bases from the 3 boards. I then painted them using some blue spray paint I had from another project.


I then cut some scrap trim that was already primed white to 6", using a 30 degree angle on my miter saw.


I measured and marked where I wanted the angle point to sit on each end of the 3 boards. I think these were at 7 inches. I used wood glue and 1/2" screws to attach the pieces.


I spray painted some wood lath white and cut it to 7". I tried something different and overlapped the ends at a 45 degree angle. (Really I was too lazy to keep adjusting the miter saw.)


I used wood glue to sandwich them to the boards, about 13" from each end and secured them with 3/4" screws. Since these scraps are so thin, it is important to drill a pilot hole so the wood doesn't split.


Now to put the snowflake together. This process is one that came out of trying several different ways. Sometimes I was so frustrated! I don't like the maths and I want the "lines" of the snowflake to be evenly spaced. I have a protractor that was set with the perfect angle for each board, but my loving, helpful Hubby was putting stuff away and unknowingly reset the angle. I tried to find that angle again for this tutorial, but after 15 minutes of turning one board slightly left or right, I gave up. I know there is a simple math equation to figure it out, but...you know...maths.

Anyhoo, I measure, mark, and drill a hole in the halfway point on each board. From the back, I screw through the hole of one board, then align the screw in the hole of the second and third boards. While there is only one screw holding it together, I can easily swivel the boards to get the right spacing. Once I have the right look, I add screws at other points, making sure to get all 3 boards.


I then turn the snowflake over and reinforce the boards with more screws. Overkill...? Maybe, but as they say, better to be safe than sorry.


Ta-da! We have a snowflake! Perfect for display from December through January. And guess what...? I need to go make another one. I haven't kept any for myself...


Friday, May 5, 2017

A Small Tutorial...

Mother's Day is coming! I need my booth to be prepared! What is something fast and easy for me to make several of? 

Small pallet signs! 


Problem: I don't have any pallet wood right now. Solution: 5 1/2" x 6' cedar fence board. This stuff is rough, so plan on sanding it down and creating lots of sawdust. You can absolutely save time if you use other wood, but in this case it was faster to sand than go shopping. 

I cut the boards to 10 3/4" lengths. Why, you ask? Because I wanted the signs to be square, and 2 boards next to each other measures 10 3/4". (There's that sneaky math creeping up on me again!)


I then cut some wood lath 8" long. I glued and screwed 2 on the backs of the cedar board to hold them together.


Two cedar boards and 2 wood lath gave me enough pieces for 6 pallet signs. I had 2 - 5" lengths of the cedar board left over, so I made them into smaller signs. Waste not, want not!

Here's my stack, all ready to go!


All I had to do now was decide how I wanted them to look. I stained all of them in either Minwax Jacobean, Ebony, or Gray, and added some clear coat spray. Then I found some cute quotes about mothers on Pinterest. I got out my new favorite tool, a white chalk marker (yes, I have a new favorite tool for just about every project I do), and free-handed the quotes. I finished with a last spray of clear coat.

Viola! 


And the smaller signs:


Now my booth will be full and ready for Mother's Day!

Wednesday, April 26, 2017

Are You Being Served...?


Super simple serving trays. I have done serving trays before, but these are a little different. I made these from wood slices. Luckily, I didn't have to cut down the tree or make the slices. My uber talented sister-in-law gave me several tree slices that were left from her son's wedding a couple of years ago. (She is always ahead of the trends.)

These wood slices have a "live edge," meaning the natural edge of the wood is part of the design. Here are a couple of examples I love:

For my live edge serving trays, I sanded the flat part of the slice until it felt smooth enough. For the first one, I taped off the edge of the circle to make a border. Then I used chalkboard spray paint. When it was dry, I added some leather straps from an old belt. I attached the straps with screws to make handles.


The other one is basically the same, but I tried it without a border. I'm still not sure which one I like better.


In case you are wondering, I did not make the dessert on the above tray. I just happened to have it left over from our family's annual Easter dinner. And yes, it was as decadent as it looks!


Monday, April 24, 2017

It's All About Family...

Look what I made out of a reclaimed wood cabinet door!


Can you believe it? It looks like I used a frame. This was soooo easy! I'll show you some steps, but I forgot to get pics of the entire project. (Smacks hand to forehead)

I have found a new love. It's the ReStore in Ogden. They have so many fun things to buy. You never know what you will find and your mind works overtime thinking of what to create. It's like a thrift shop for DIYers! All proceeds go to Habitat for Humanity. Check out the link to learn more. 

I found several reclaimed cabinet doors. The prices run between $2 and $7, but I have gotten several for $1. A dollar guys!

Anyhoo, I taped off the door to paint the "frame" white. I wanted this project to have a "chippy paint" look, so before I painted, I rubbed a little wax along the edges of the frame. When the paint is dry, you can wipe or scrape off the wax and get an awesome time-worn look. 


I cut down some scrap wood I had and painted it in several different colors. Then I sanded them a little to make them look worn.


After everything was dry, I used wood glue to attach the scraps of wood to the center of the door. I weighed down the scraps with whatever heavy thing I had nearby. 

I had the word "family" left over from one of my sister's projects. I painted it white to match the frame and then sanded it to rough it up. I think it helps to stand out from the background. I used wood glue for this as well.

I love it! So fun and it makes me happy!


Monday, April 17, 2017

In Love With a Ladder...

I fell in love with a ladder. A ladder that isn't used as a ladder. This is the ladder in question:

Old Wood Ladder & Chicken Wire Frame:
Source
I followed the pin to credit the original source, but none was found. That makes me sad. Someone should get credit for their beautiful inspiration. Getting credit is something near and dear to my heart, as you may know. If you want to know the whole story, click here.

Anyhoo, I simply had to make one of these ladders! I love the idea! Just one teensy-weensy problem. I don't have an awesome old ladder hanging around. Guess I'll have to build one!

First I decided what size ladder I wanted. I had some 2" x 2" x 8's. To make it easy, I cut one in half. (To prove that I really do use math later in life, that means 2 pieces of wood 24" long.) Then I cut 3 pieces of the 2" x 2" to 12". I wanted to be able to display an 8 x 10 frame between the rungs.


Next I made marks where I wanted the rungs to be, evenly spaced. I forgot to write down the exact measurements, sorry.  I used a counter sink drill bit to drill holes for the 2 1/2" screws. Using a counter sink bit will make sure the screw head doesn't stick out from the wood. We don't want a Frankenstein ladder, do we?


Time to assemble the ladder. I used wood glue to hold everything in place and let it dry. I feel it's easier to screw together if the ladder is already one piece. 


I used my Ryobi driver to attach the screws.


Time for some stain! Once again, I used Minwax Jacobean stain. 


When the stain was all dry, I sanded down the edges to give the ladder an "aged" or "worn" look. I then added some semi-gloss clear coat to "wake-up" the wood. When that was done, I measured out some chicken wire. This stuff is fun to work with, but can be sharp. Wear gloves and use wire cutters to get the amount you want. 


The chicken wire was too shiny for my taste, so I whipped out some black spray paint. I just happened to grab my can of High Heat paint, not because I plan on heating the wire, it was just the first can of black I saw. I wasn't meticulous in making sure the black paint covered everything. I just wanted to tone down the "newness" of the wire. 


For the next part, I grabbed my staple gun. I then added staples to the back of the ladder to hold the chicken wire in place. 


I also added some D-ring hardware (no picture, sorry) to hang the ladder on the wall. I added the hardware so that the ladder can hang horizontal or vertical. Or the ladder can just lean against a wall. 

I thought the ladder was missing something, so I added some fun decorative metal pieces. 


I also stuck some clothes pins on the wire to hang pictures, notes, memos, reminders, etc. 


I am very happy with how it turned out! What do you think?